Pages

Monday, April 30, 2012

Citrus Granola Parfait

Are you on Pinterest? If your answer is "no", you probably need to be checking it out. I love being able to go to an online resource that allows me to create virtual "boards", label them according to my own personal interests and when I'm surfing the internet for interesting things in line with my interests, I can save them (pin them) to my boards and have the original source to link to. This can be a recipe, a product, a hairdo or even just a great piece of photography. The options are broad and the site is so easy to maneuver. I'm so hooked. I've found new blogs and a wealth of creativity and inspiration.

I could eat breakfast for every meal and be entirely happy. Breakfast for snacks works too. One of the recipes that I pinned this past week was a citrus granola from The Tolerant Vegan that she featured as a parfait coupled with yogurt. I'm not so sure where this compulsion to "make this as soon as possible" comes from but I suspect if you're reading this you totally get it.

This recipe made enough to make 4 generous parfaits but now that I've made it and tried it, the next batch will be multiplied to have enough around to last for a month.

Recipe adapted from Oprah.com

zest of 1 lemon
zest of 1 lime
zest of 1 orange
2 tablespoons grape seed oil
4 tablespoons orange juice
4 tablespoons lemon juice
2 tablespoon lime juice
3 tablespoons maple syrup
1 teaspoon vanilla extract
2 cup rolled oats
1/4 cup pumpkin seeds
1/4 cup sunflower seeds
1/4 cup raw walnuts, chopped
1/4 cup almonds, chopped
1/4 cup unsweetened dried coconut
1/4 cup flax seed
1/4 cup dried apricots, chopped
1/4 cup dried cranberries
16 ounces yogurt (I used Greek yogurt)

Preheat your oven to 300 degrees fahrenheit.
Combine all of the ingredients except the yogurt together in a large bowl Spread in a 9x13 pan (or cookie sheet)


Bake for 15 minutes and give it a stir. Bake for another 15 minutes. Cool completely. To make
parfaits, layer yogurt and granola finishing with the granola. I love the fresh taste of the citrus in this granola. The lime especially comes through - it'll put a smile on your face and leave you wanting more.


Tuesday, April 24, 2012

Mexican Chicken Casserole

Spring inspires me to get in the cupboards and use up alot of the accumulated cans of things that were so important to get for a recipe that just somehow never materialized. When Psychgrad put up a Mexican style dish it reminded me of how much I've come to love Mexican flavours. I have to admit I honestly don't know but when I think of Mexican food the ingredients that come to mind are beans, chili peppers, tomatoes, and cilantro. I had some ground chicken and turkey in the house so I just started to layer and the end result was amazing. You don't need a recipe to create something fantastic; a good pallet helps and some imagination and you're good to go.


1 lb (450 g) ground chicken
1 lb (450 g) ground turkey
1/2 large onion, diced
1 red pepper, diced
3 cloves garlic, minced
1 14 oz can black beans
1 14 oz can kidney beans
1 28 oz can diced tomatoes
1 7 oz tin tomato paste
1 Tbsp chili flakes
2 Tbp taco seasoning
2 Tbsp dried cilantro (you could use fresh)
taco chips
12 oz mix of pepper jack, mozarella and cheddar cheese
3 Tbsp olive oil

1.  In a large saucepan on medium heat, fry onions and red pepper in olive oil until soft (3 minutes).  Add garlic and mix well.
2.  Add ground chicken and turkey and cook until no longer pink. 
3.  Continue to layer each of the ingredients (i.e. add slowly) combining the flavours as you go up to and including the dried cilantro.  Simmer for 10 minutes.  Check seasonings - add more heat or taco seasoning to your taste.
4.  Put a layer of taco chips on the bottom of a large (11x14) oven dish and top with the casserole mixture.  Top with a layer of taco chips and finish with the cheese.
5.  Bake in a 350 degree oven  for approximately 40 minutes or until cheese is melted.

Note:  This recipe is enough for 6-8 hungry people.  You can easily cut it in half and add or delete ingredients as you wish.  Use jalapeno peppers if you have them and if you want more heat, leave the seeds in the peppers.

Saturday, April 21, 2012

Quesadillas & Sweet Potato Chips with Lime

Only a small handful of friends even know that I have a food blog. Usually when I take pictures of food around friends, they just chalk it up to me being strange.  But, when I invited friends for dinner a couple of weekends ago and started taking pictures, they immediately said, "Do you have a food blog?"

Uhhh....what?  I'm just taking pictures...why would you assume that I have a...what are they called....a food blog?

Yeah.  I'm not a good liar.

For this meal, I wanted to be as close to vegan as possible.  I knew that my guests would eat dairy products when out at friends, but I'd really prefer to make my guests feel as comfortable (and unconflicted) as possible when eating at my home.

As an appetizer, I served some melba rounds with preserved bruschetta.  Everyone that I serve this bruschetta to seems to really like it.  Personally, I'm not a big fan.


For the main, I wanted to do something interactive.  I think it sets an informal tone while allowing guests to customize their own meal.  This is particularly useful when you have guests that have food restrictions and are fussy eaters.  Of course, you don't get the 'wow factor' that you might get when you put down nicely plated food or even set out a large dish for a family-style dinner.  But, you can always add in these elements in your side dishes or for the dessert.

For the main, I prepared a mise-en-place of ingredients for quesadillas.  The selection of ingredients included black beans, mushrooms, shallots, artichokes, sun-dried tomatoes, chipotles in adobo sauce and vegan cheese (Daiya).  


Daiya is a Canadian-based cheese company that is known among vegans as being one of the better options.  It started appearing in Ottawa a couple of years ago.  It melts up well, tastes good and you wouldn't even miss mozzarella if you use it.  


The picture of the quesadilla is a bit shoddy -- due to time constraints.  But, basically, we put one fajita shell on the pan, flipped it after a minute and then added the desired ingredients.  Then, the second fajita goes on top. After a couple of minutes, we carefully flipped the whole thing.  I'd also recommend putting a lid on the pan while it cooks just to get a bit of steam to the cheese.


I think it went over well.  The only issue is that it wouldn't really work if you had a lot of guests because each quesadilla basically requires its own pan and you don't want people eating at different times or eating cold food while they wait for others to finish.


In addition to the quesadillas, I went with Noble Pig's Sweet Potato Chips with Lime.


Easy to make and tasted great!  I thought I might have too much with two pans of thinly sliced sweets potatoes (about 3 large).  But, they shrank down a fair bit and I'm sure if I had made more, they would have been eaten.


My guests brought a nice salad (no picture) and the meal was great!

The dessert was a bit more of an experiment. I thought it would be a calculated experiment to make trifle, which everyone loves, but use soy milk.  But I learned the hard way that soy milk doesn't work with regular instant pudding mixes the same way that milk does.  Apparently animal fat (found in milk) is required for the pudding to actually thicken up.  It probably didn't help the thickening issue that I also bought kosher instant pudding to make sure that it didn't have any gelatine in it.  Next time, I'll buy a vegan instant pudding mix.

In the end, I had to head up the milkshake-like mixture and add a lot of cornstarch (mixed into water).  Even then, it didn't thicken up until it cooled down in the freezer.   Thankfully, it worked out (despite burning some of the vanilla pudding when trying to get it to thicken.  Maybe a bit more of a creme brulee flavour than usual, but still very tasty!


I'll leave you with a photo of a recent knitting project that I completed.  A free pattern of this leaf-patterned baby blanket can be found here (if you're a Ravelry member).  The photo on the left is before blocking and the photo on the right is after blocking.

; \

Tuesday, April 17, 2012

Healthy Eating with President's Choice

Vacation is over and I got back home just 2 days before Passover. Panic. Somehow we managed to pull it all together; it was a total group family effort and I must say I'm proud of how diligently everyone worked to make it all happen. While I was away I received the newest Insider's Edition from " President's Choice .


I'm happy that we're focusing on healthy and conscious eating. President's Choice is expanding their Blue Menu line of healthier choice foods that now has over 400 items in the line. PC's Insider's Report has included a wealth of healthy tips created by the Blue Menu panel comprised of a dietician, a doctor, a chef and two working moms. The benefit to having these tips is that you not only learn how to read the packaging more effectively by having visual markers that tells you what there is more or less of in the product (i.e. less sodium, higher fibre, less fat etc.) The tips also tell you why it's important to have more or less of things.

For example: "Why Reduce Sugar? Sugar is a simple carbohydrate that occurs naturally in fruits vegetables, milk and milk products. Products with naturally occuring sugar, such as fruits and vegetables contain vitamins and minerals, while refined sugars found in processed foods like candy, soft drinks and syrups lack nutrients, have few nutritional benefits and are considered empty calories."

The tips in this edition of the Insider's Report have kept this edition around the house for a whole lot longer than other editions. I've had a chance to sample a couple of the products. Both Almond Milk and Quinoa are items that I normally have in the house so happy me. My morning generally starts off with a fruit smoothie and I love my smoothie with almond milk.

Take a banana, a few strawberries (fresh or frozen) pour in some almond milk; add 1 Tbsp of flax seed, a tsp of omega 3 oil and voila - refreshing and a healthy way to start your day.


I knew I wanted quinoa for dinner; great opportunity to try the black and white quinoa, something I hadn't tried before.

1 acorn squash, baked
1 pkg. PC quinoa
2 cups water
2 Tbsp olive oil
1/2 onion diced
1 cup dried cranberries (or craisins)
1 cup chopped mushrooms beet leaves chopped drizzle of blood orange balsamic vinegar

1. Turn oven on to 350 F 2. Cut acorn squash in half, take out seeds, sprinkle with a little olive oil and turn upside down on to foil lined cookie sheet. Bake until soft and carmelized (about 30-40 minutes)


3. In a medium saucepan cook 1 cup of quinoa to 2 cups of boiled water. When the quinoa comes to a boil, turn down to medium low and let simmer, covered for about 12 minutes. Take off the heat and fluff with a fork.
4. Add onion to warmed olive oil and cook until the onions soften. Add the remaining ingredients except for the blood orange balsamic vinegar.


Yummmmm. Go out and get some quinoa and experiment with it - you'll love it!!!

Saturday, April 14, 2012

Canadian Lentil Contest: Best in Baking

Remember these cupcakes?  They're the Red Velvet Lentil cupcake that My friend, Ron, and I blogged about here.


I was beyond excited to get a mid-day call from Ron while at work letting me know that we had won our category (Best in Baking) in Canadian Lentil's Recipe Revelation contest.  Click on the e-book below to see some of the submissions and the four winning recipes:


Monday, April 9, 2012

Stanley's & Sunnyside Cardigan

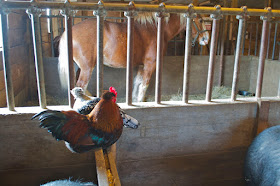
A couple of weekends ago, we joined some friends at Stanley's Old Maple Lane Farm. They have a sugarbush there (buffet style, with a smallish selection).  The standout for me were the farm animals.

These are just a selection of them:


Did you know that it takes 40 buckets of sap to make one bucket of syrup?  Kind of makes me feel a bit better about the high price we pay for maple syrup.  Well...sorta.


Aside from that, we spent time running after our friends' kids.  Stanley's is a great place to take kids on a nice day.  Get them sugared up with maple syrup and then let them run around.

I'm still wrapping my mind around this idea of having a little one around all of the time.  We've pretty much been limited to 3-4 hour chunks to this point.  I'm not sure that there is a way to truly prepare yourself for that.

So far, our preparations (in general) have been fairly minimal.  Basically, it has consisted of knitting and reading information online (which can be really informative or scary depending on what your search turns up).

This is probably one of my favourite knits.  I actually started it before getting pregnant, with the intention to give it to a friend.  But, now I can't part with it:


This is the Sunnyside pattern.  It's quite popular and versatile.


I promise I won't share every article of clothing that we buy...but this one is really cute.  R bought in while on a recent trip to Boston.  My favourite part is quote on the back.


Friday, April 6, 2012

Adding a Blogger to the Mix

I always work best with a deadline. Give me an infinite amount of time to get one thing done and it may never happen. Give me a deadline to get five things done and then we're in business.

So, I guess you could say I have a deadline. At first it seemed like 9 months would last forever...but with under 4 months to go, I think I'm going to have to kick it into high gear.


(Junior (baby's current name) is quite comfortable facing inward, so the profile shot is taken 
from a distance and kind of blurry. The line over the body is Junior's legs.  )

Here are a few of the items I've made for Junior:

Aviatrix Hat:


Baby Chalice Blanket (pre-blocking):


Owlie Sleep Sack:


I'll have several more projects (currently at various stages) to share in the near future!

Wednesday, April 4, 2012

Ricotta Semifreddo for the Cooking Light Virtual Supper Club


This month's theme of the Cooking Light Virtual Supper Club is Italian and lots of fine inspiration from the members this month.


I seem to gravitate towards the dessert portions of each menu and this month is no different. I decided to make the Ricotta Semifreddo "Semifreddo" is an Italian term that refers to any number of frozen or chilled desserts. When making a dessert with ricotta cheese, it's really worth getting the best ricotta you can. It makes a huge difference to the flavour of your finished product.

Ingredients

1/2 cup sugar
1/4 cup fat-free milk
1/4 cup honey
2 teaspoons grated orange rind
1 1/2 teaspoons vanilla extract
1/8 teaspoon salt
3 ounces fat-free cream cheese, softened
1 (16-ounce) container part-skim ricotta cheese (such as Calabro)
1/2 cup chilled heavy cream
Fresh orange sections (optional)
Fresh currants (optional)

Preparation

1. Line a 9 x 5-inch loaf pan with plastic wrap. Combine 1/2 cup sugar, milk, honey, orange rind, vanilla extract, 1/8 teaspoon salt, cream cheese, and ricotta in a blender; process until smooth. Pour the mixture into a large bowl. Pour cream into a medium bowl, and beat with a mixer at high speed until stiff peaks form. Fold 1/4 cup whipped cream into ricotta mixture. Fold in the remaining cream.

2. Spoon mixture into prepared loaf pan. Cover with plastic wrap, and freeze at least 8 hours or until set. Remove semifreddo from freezer, and let stand at room temperature for 20 minutes. Discard top piece of plastic wrap. Invert loaf pan onto a serving platter, and tap to remove semifreddo. Discard the remaining plastic wrap, and slice semifreddo crosswise. Serve with orange sections and currants, if desired.


Check out what the other members of the group are making this month.

Sandi- Pork with Lemon Caper Sauce"

Roz - Risotto with Fresh Mozzarella, Grape Tomatoes and Basil

Jerry- Apple Chicken Panini with Fig Jam

Val - Dreaming of Italy Caprese Toast

Each and every one is gorgeous.