Friday, July 20, 2012

Raspberry Banana Muffins


Apparently I'm supposed to be relaxing...but I just can't bare the thought of missing out on local, seasonal produce.  Already, the main strawberry season is over! I'm thinking I need to take advantage of everbearing strawberry farms, like this one:


Longo's is a grocery chain in Toronto. Does anyone know where I can buy everbearing strawberries in Ottawa? I have a dismal track record with growing them in my backyard. But, I am happy to report that IT'S RASPBERRY SEASON!


I had intentions of going raspberry picking last weekend, but I had to come to terms with reality that picking in 40 degree weather (about 105 F) is just not realistic when you're 9 months pregnant. So, R kindly went to the Byward market and picked up a flat of raspberries. Of course, it wasn't completely altruistic, seeing as raspberries are one of his favourite fruits. He quickly put in a request for raspberry jam.


After making the jam, I still had at least half a flat of raspberries, so I searched around for a muffin recipe to add to our collection in the freezer. I've been on a freezing food kick lately (in preparation for having less time to cook once the baby arrives).


R was skeptical that I'd be able to fit anything else in the freezer. I told him -- when there's a will, there's a way! Now, I just need to work on his will to find things in the freezer.

I found this recipe at Daily Unadventures in Cooking.

Raspberry Banana Muffins 
(makes 12)


Ingredients

1/4 cup soft butter
1/2 cup sugar
1 teaspoon vanilla
1 egg
1 banana, mashed
2 cups all purpose flour (or 1 cup all purpose, and 3/4 cups whole wheat)
1/2 teaspoon salt
2 teaspoons baking powder
1/2 cup milk
2 cups raspberries

Preheat oven to 350F.

Using an electric mixer or a wooden spoon and a bunch of elbow grease, cream together butter and sugar. Add egg, vanilla and banana and beat until well combined.

Stir together flour, salt and baking powder in a small bowl. Add milk and stir until just combined. Fold in raspberries. Line a muffin tin with muffin papers and divide the mixture amongst the tins. Bake for 25 minutes.


Verdict: The muffins turned out really well.  Of course, the raspberries fall apart as soon as you mix them in, but with some light mixing, I was able to save larger chunks of raspberries.  The tartness of the raspberries really comes through when you're eating the muffins.  I didn't find there to be much of a banana taste. But, I'm used to a banana recipe that includes 4 bananas in 12 muffins.  So, it's really comparable.  I also like how there isn't a tonne of sugar in the recipe.
StumbleUpon

Wednesday, July 18, 2012

Grace's Sweet Life


I recently received a copy of fellow blogger's Italian dessert cookbook called Grace's Sweet Life; the same name as her  blog . My biggest problem with this cookbook, filled with the most drool worthy pictures of classic and contemporary Italian desserts, is where do I begin?

Grace Langlois, originally from Belgium, of Italian parents and living in London, Ontario, Canada has overcome several obstacles to reach the point of publishing this visually gorgeous book.  Kudos to you Grace!!

I've learned that although I find Italian cooking to be straight forward and simple, the creation of the pastries is another story.  We're not talking 4-5 ingredients anymore and the final products generally look like a work of art.  Think about a Seven- Layer Cake (Torta Sette Strati) or Mini Lemon Mousse Cakes with Limoncello-Lemon-Jelly (Mini Torte Mousse al Limone con Celatina di Limone al Limoncello) or Sicilian Cannoli (Cannoli Siciliani).  Is your mouth watering yet?

I really wanted to reproduce one of the recipes in the book and finally decided on Grace's Orange Cake  (Torta all' Arancia)

Now, although my cake didn't look like Grace's (to say the least), I found that in my oven (a fast oven), the 350 F was too high.  The next time I make it, I'll do it at 325 F.  Note I said I would make it again.  It's so easy to put together.  I also think my eggs were not completely room temperature.  The cake fell somewhat but the flavour was incredible.  A mild but very distinct orange flavour comes through and with a cup of tea or coffee, I can't imagine this not being a hit.  I didn't finish it off with the orange syrup but I do think it would be a great addition.  I prefer dry cakes without the addition of syrups and icings.


Cake

6 large eggs
2 cups (250 g) all-purpose flour
4 tsp baking powder
1/2 tsp salt
1/2 cup (120 ml) vegetable oil
1 tsp pure vanilla extract
1 cup plus 2 Tbsp (225 g) superfine sugar, divided
grated zest of 2 oranges
1 cup (240 ml) freshly squeezed orange juice
1/4 tsp cream of tartar

Syrup

1 1/2 cups (355 ml) freshly squeezed orange juice
1/2 cup (113 g) superfine sugar
zest of 1 orange in large strips (make sure no pith is attached)
1/2 vanilla bean, split and seeded
2 to 3 Tbsp Cointreau or other orange liqueur

Directions
1.  Separate the cold eggs.  Place the yolks in a large bowl and the whites in a stand mixer.  Cover each bowl with plastic wrap and allow the eggs to come to room temperature, about 30 minutes
2.  Preheat the oven to 350 F (180 C).  Very lightly coat with butter the bottom and sides of a 10 inch tube pan with feet and removable bottom
3.  Using a fine-mess sieve, sift together the flour, baking powder, and salt into a medium bowl.  Whisk to combine well.
4.  Use a handheld mixer to beat the egg yolks, oil, vanilla, and 1 cup (225 g) sugar on medium speed until light and fluffy, about 2 minutes.
5.  Beat in the orange zest and juice
6.  Reduce the mixer speed to low and gradually add the flour mixture, beating to just combine (do not overmix)
7.  In a stand mixer fitted with the whip attachment, beat the egg white to stiff peaks beginning at low speed and gradually increasing to medium-high.  When the whites are foamy, add the cream of tartar. At the soft peak stage, add the remaining 2 Tbsp (30 g) sugar.
8.  Using a large flexible spatula, fold one-third of the egg whites into the egg yolk mixture to lighten the batter, then carefully fold in the remaining egg whites until just combined.
9.  Pour the batter into the prepared pan, spreading it evenly with an offset spatula.
10. Bake until golden and a cake tester inserted into the center comes out clean, 50-60 minutes.
11. Remove from the oven and immediately invert the pan onto a wire rack.  Let the cake cool completely in the pan upside down on the rack.
12. While the cake bakes, prepare the orange syrup.

To Make the Syrup

1.  In a small saucepan over medium heat, bring the orange juice, sugar, orange zest, and the vanilla bean and seeds to a simmer, stirring until the sugar dissolves, about 5 minutes
2.  Reduce the heat to low, add the liqueur and continue to simmer until the syrup reduces and thickens slightly - about 5 minutes.
3.  Remove from the heat and strain the syrup through a fine-mesh sieve into a pourable container.  Allow the syrup to cool slightly.

To Assemble and Serve

1.  Flip the cake pan over, carefully run a thin knife around the edges of the pan , and turn the cake onto a serving plate or cake stand.
2.  To serve, place the cake on dessert plates and serve with warm orange syrup.


You can see how light and airy this cake is and the best part is it's not too sweet.


I found Grace's instructions to be very clear and precise.  The pictures in the cookbook are amazing and do justice to each dish.  In the words of the television shopping cart ladies, Anna and Kristina, this book is a "BUY".  The only challenge I found with the book was that some of the recipes are long with many steps.  A 5 page recipe can be rather intimidating.


StumbleUpon

Monday, July 16, 2012

A Taste of Yellow - A Tribute to Barbara Harris


I've always said that bloggers are great people sharing the love of food and wine.  I never get tired of browsing other blogs, learning about new foods and getting tips that I can incorporate into my own kitchen.  

4 years ago I met Barbara Harris from Brisbane, Australia.  We forged a very quick bond that went a step deeper than just food and wine.  Although I didn't have cancer, we both knew what it felt like to be sick; to spend endless hours in a hospital for one treatment or another; for missing our appetites but still wanting to continue to blog about something we both loved.   Barbara was a voice of encouragement for me during rougher times and I always appreciated her generosity, even in her darkest times.  I was lucky enough to be the recipient of a kidney transplant and slowly my health improved and I could return to my everyday life without having to be linked to a machine 3 times a week. 
Barbara started the event, Touch of Yellow, in support of the Lance Armstrong Foundation.   
One year, during the "Touch of Yellow", I decided to submit  but also included a bracelet that I made and named after her.  I actually sent it to her and I believe that for both of us it meant a great deal.  When Barbara found out that the World Transplant Games would be near her home, she reached out to me and invited me to stay with her family during the games.  I was floored - I mean - she really didn't know me and was ready to open her home to me.  

Unfortunately, Barbara lost her fight with cancer and here we are paying tribute to this exceptional lady who in her most unassuming way, managed to win the love and respect of fellow bloggers all over the world.  Barbara's blog  Winos and Foodies is still online and I would encourage you to browse and get a sense of how special she was.

Meta from  What's for Lunch Honey has run The Monthly Mingle for as long as I can remember and this month Jeanne of Cook Sister will be the sponsor of The Monthly Mingle - A Tribute to Barbara Harris.


I'm sitting and enjoying what I call a pimped up Mango Lassie.  I added a little rum to it, so here's to you dear Barbara.  Your suffering is over.  You will not be forgotten.  Thank you for your kindness and your friendship.

1/4 cup low fat plain yogurt
1/4 cup rum
1 cup chopped fresh mango (frozen works too)
Juice of 1/2 lime (or lemon)
1 can Sanpellegrino Aranciata

In a blender add all the ingredients (you can add ice cubes also if you like)
Blend until frothy; pour into glass and garnish as you like.  

You have until August 6th to submit your tribute to Barbara Harris.

Here are the rules:
1. Make or bake something yellow (sweet or savoury), or something using yellow ingredients. Let your imagination run wild: lemons, yellow peppers, yellow plums, yellow carrots, yellow squash - the possibilities are endless!
2. Post the dish together with any cancer stories or memories of Barbara on your blog between the 1 July and 6 August 20012. Older posts will not be accepted. Please also note that your post should be prepared exclusively for thre Monthly Mingle and should not be submitted to any other events.

3. Please link your post to this announcement and to Meeta's Monthly Mingle page. Use of the lovely logo Meeta designed is optional in your Monthly Mingle post.

4. Please submit your entries before midnight (your time) of the 6 August 2012 by sending me an e-mail (emailcooksister AT gmail DOT com) containing the following:
  • "Monthly Mingle entry" in the subject line
  • Your name
  • Your blog name and URL
  • Your location (just the country or city is sufficient)
  • The name of the dish
  • The URL of the post in which the dish appears
  • Please attach a photo of the dish (max 500 pix wide) to your e-mail 


StumbleUpon

Thursday, July 12, 2012

Pimenton


A chef is a most interesting breed indeed.  You simply engage a chef in a conversation and you get an outpouring of passion that's unmistakable.  This shot of Chef Jose Arato has passion written all over it - it's unmistakable.  Chef Jose is the driving force of Pimenton (the name is Spanish paprika), a gourmet and specialty Spanish and Mediterranean food store.  Also offered are classes in one of Jose's specialties - Spanish Paella.


I'd been wanting to take this class for quite a while and finally all the stars were aligned and I attended a class in the Art of Making Spanish Paella.  This dish is not so intuitive; there's a process to making an incredible paella.  


I expected to learn something.  That was my only expectation.  What I got was a full package.  When I arrived, I was greeted by a very warm and hospitable man in a green and red chef's garb.  At first I thought - Oh..it's Santa Clause, but then I figured out that the colours are a theme of the colours of peppers.    Jose (as he's preferred to be called; as opposed to Chef) had a full table of appetizers ready for us;


We learned about the different sizes of paella pans; the configuration and the importance of having even heat when cooking your paella.


Ingredients:

2 cloves garlic, peeled
3 tablespoons parsley, chopped coarsely
Pinch saffron, infused
4 chicken breasts cut up
2 squid, cleaned, cut into rings
16 small clams, soaked to remove sand
16 shrimp, shelled and deveined
Spanish Oil as needed
1 medium onion, finely chopped
1 red pepper, finely chopped
Sofrito * see recipe below
3 cups Bomba rice
6 1/2 cup Chicken or Fish broth, hot
1 tablespoon salt (or more as needed)
1/2 cup green beans
1/2 cup frozen peas
1/2 lemon
2 sweet roasted red peppers
2 dozen mussels, steamed
Lemon wedges for garnish

Directions:

1. Place 1/2 cup of stock in a small saucepan and bring to the boil. Remove from the heat, and add the saffron and cover with plastic wrap. Set aside. This step is only necessary if your saffron is not dried enough.

2. In a mortar and pestle or small food processor, mash the garlic, parsley and some course salt to a paste. Set aside

3. Heat 6 tablespoons of oil in a paella pan and add the shrimp. Cook briefly and then add the clams and squid. Remove from paella pan. Add more oil if necessary, as dry paella can result if there isn't enough oil. Add the onions, pepper and when these are soft but not brown. It’s time to add the sofrito, and the garlic/parsley & saffron mixtures. Add enough stock to come up the rivets of the paella pan. Bring to a boil. Squeeze the lemon and season the paella at this point.


I asked about the rice used for paella and was quickly met with the answer "Bomba rice is the ONLY rice for good paella".  The reason - this rice, grown without pesticides absorbs 30% more of the broth while having a lower starch content.
Just before adding the rice, chef seasoned the paella with a goodly amount of salt.  It's what makes the flavour pop.  This is probably the one area we didn't agree on.  The amount of sodium can be a killer and my preference would be to use a whole lot less salt.  I found the flavour as rich before the addition of salt.


Add the rice in one line and then stir to mix with the stock. Allow to boil hard for 8 minutes.


Boil overs are part of cooking, right?  Jose seems totally unaffected and takes it all in good humour.


4. After 8 minutes, add the green beans, peas and nestle the shrimp on top. DO NOT STIR, as this releases the starch in the rice. Continue cooking at a high roll for another 2-3 minutes or until the rice is no longer soupy but enough liquid remains to continue to cook the rice. Now, turn the heat to low. Place the mussels on the top of the rice and arrange strips of roasted red peppers on top of paella. If your paella bottom does not fit properly on the stove burner, continue cooking in a pre-heated 350F oven for another 10 minutes. Remove from the oven when the rice still looks a bit wet. Cover with foil and let the paella rest for 5 minutes. Garnish with lemon wedges and parsley and serve from paella pan.

Sofrito (an aromatic tomato based sauce that forms the base of many Spanish dishes)

1 onion
1 garlic clove
1 28oz can of crushed tomatoes
Olive oil
2 tablespoons sugar
1 teaspoon salt

1. In a saucepan, heat the oil; add the chopped onion and garlic. Fry gently until fragrant, about 6 minutes.

2. Add crushed tomatoes, sugar and salt. Cook at medium heat until some of the liquids has evaporated. Blend with a hand blender. Freezes well.


The sofrito base, along with the infused saffron and lemon take this dish to a whole new level of taste.

How Gorgeous is This???


and lets not forget about this delicious gluten free almond cake.  The dessert was for sure above and beyond but absolutely appreciated.  Chef Jose began his culinary journey as a pastry chef and he certainly keeps himself in shape.  This was the second pastry I've tasted from Pimenton.  So good and I wouldn't think about picking up one of his cakes or pies, particularly for those with special food needs.


When not running Pimenton, you can find Jose cooking at Evergreen Brick Works Farmer's Market , catering large and small events and participating in community events.  You can see the joy of feeding people on his face.  This has to be a labour of love; why else would you get up at the crack of dawn, cook and bake in the shop all day, teach a class at night until 10 or 11 p.m. and then cater  and attend events on weekends.  Only a labour of love could motivate one to work so many hours and still keep that warmth and humour alive.
Pimenton on Urbanspoon
If you're in the Toronto area and are looking for fine specialty foods, a good caterer or a really fun Paella cooking class - give Chef Jose a call.  You'll walk away having learned something new and feeling like you got your money's worth.


StumbleUpon

Saturday, July 7, 2012

Strawberry Sauce


A couple of weeks ago, R and I picked about 4 litres of strawberries.  My trusty kitchen stool came in handy for picking since getting up and down is a bit challenging at this point in the pregnancy.  After freezing 3 large freezer bags full, eating a bunch and making some sugar-free jam, I had about 6-7 cups of strawberries left.  

I knew I wanted to make a preserve out of it, but I didn't want to make more jam and also didn't want something that had mounds of sugar.  So, I was really happy to find this recipe on fellow Ottawan's food blog, If Music Be the Food of Love, Play On.  

This recipe comes from Pat Crocker's Preserving book.

Strawberry Sauce


4 cups mashed or blendered strawberries that are well-ripe-to-overripe
1/2 cup granulated sugar
1/2 packed brown sugar
grated rind and juice of one lemon
1 tablespoon fancy molasses
1 tablespoon raspberry wine vinegar (can use balsamic vinegar)

Prepare your jars in a hot water bath to sanitize them (picture below is after I raised the jars from the hot water).


Hull and clean strawberries


You'll want about 6 cups worth of strawberries..


To get 4 cups of crushed strawberries


I basically put all of the ingredients in around the same time.  But opted to add the sugars first and add the other components when it that came to a boil.


Let boil for about 10-15 minutes (length of boiling will determine thickness of sauce and amount of sauce that you're left with).


Jar sauce (as per normal preserving instructions) and boil in a hot water bath for 10-15 minutes.  Let jars cool overnight and check seal.   


I'm also adding this recipe to recipes.ca, a new cooking community that celebrates Canadian food writers, culinary professionals, and of course, Canadian cuisine. 

StumbleUpon

Wednesday, July 4, 2012

Thai Seafood Salad for Canada Day and the Cooking Light Supper Club


HAPPY CANADA DAY


Canada Day, also known as Canada's Birthday is known as a day of celebration by Canadians at home and abroad.  Equally as significant on this day is the Oath of Citizenship ceremony that takes place welcoming immigrants as new Canadians (officially).  I was once one who took that oath and feel very proud to be called a Canadian.  A country of diversity, what could be more appropriate to prepare than an ethnic dish that speaks to an immigrant group that has brought us their culture and their cuisine.

My contribution to the Cooking Light Virtual Supper Club is a Thai Seafood Salad.  All the elements of typical Thai cuisine come through in this dish with a depth of texture that makes my mouth extremely happy.
  • 1/4 cup water
  • 8 ounces sea scallops
  • 1 pound peeled and deveined medium shrimp
  • 5 tablespoons fresh lime juice
  • 2 1/2 tablespoons fish sauce
  • 1 teaspoon sugar
  • 1 teaspoon chile paste with garlic
  • 1 cup red bell pepper strips
  • 1/2 cup chopped red onion
  • 1/4 cup fresh mint leaves, finely chopped
  • 8 ounces lump crabmeat, drained and shell pieces removed
  • 2 fresh lemongrass stalks, trimmed and thinly sliced (I omitted this)
  • 1 cucumber, halved lengthwise and thinly sliced

Preparation

1. Bring 1/4 cup water to a simmer in a large skillet. Add scallops to pan; cover and cook 3 minutes or until done. Remove scallops from pan with a slotted spoon; pat scallops dry with paper towels. Place scallops in a large bowl. Add shrimp to simmering water in pan; cover and cook 3 minutes or until done. Drain well; add to scallops.
2. While scallops and shrimp cook, combine lime juice, fish sauce, sugar, and chile paste; stir to dissolve sugar.
3. Add juice mixture, bell pepper, and remaining ingredients to scallop mixture; toss gently to combine.

What are the others in the Cooking Light Virtual Supper Club doing?

Val from More Than Burnt Toast made a salad of Marinated Mozzarella and Pepper (like the red and white theme going on here)
Shelby of The Life and Loves of Grumpy's Honeybunch with a main of Lobster Rolls
Sandi from The Whistlestop Cafe Cooking made Grilled Zucchini with Caprese Salad.
Helene of  La Cuisine Helene.com/ made Fresh Squeezed Limonade

Jerry from  Jerry's Thoughts Musings and Rants  brought Strawberry Parfaits for dessert.

I'd say we've got quite the picnic - wouldn't you?
StumbleUpon

Monday, July 2, 2012

Rhubarb and Saskatoon Jam


You really know you're from the prairies of Canada when you walk into a market in Ontario and you're the only one who knows what a Saskatoon berry is.  A rare find, the vendor laughed at my excitement and said "you're from the prairies aren't you".  Busted!

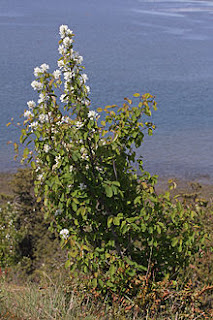
The size of a blueberry, with a more tart and less juicy consistency, Saskatoons are considered a "superfruit"; high in antioxidants and fibre, they help fight cancers and extremely good for the heart.    Saskatoons were and still are used by the first nations people; especially delicious in a sauce with game. The shrub this exceptional berry grows on looks like this:


I could have made a pie; that would have been delicious but after one meal, that's it, all gone.  I decided to make some jam and make my treasured berries last as long as possible.  When I heard that adding rhubarb stretches the quantity, well, let's just say the kitchen became my playground.

This recipe is adapted from The Alberta Farm Fresh Producers Association


1 large navel orange, finely chopped
3 1/2 cups diced rhubarb
3 cups sugar 
4 1/2 cups saskatoons
Juice of 1 lemon

Combine orange, rhubarb and sugar in a Dutch oven. 
Bring to boil, stirring constantly    
Add saskatoons and lemon juice. Boil, stirring frequently until thick, about 15 minutes. Pour into hot sterilized jars, leaving 1/4 inch headspace. 
Wipe jar rims thoroughly. 
Seal and process in boiling water bath for 10 minutes.

*NOTE:  I wanted a smoother jam so I used my immersion blender before I filled the jars.  Some would say to mash the berries before adding them to the boiling pot.

Yield: 7 cups (250 ml mason jars)

Although not at all related to the preparation of jam, my foodie travels brought me to this rare site.  How many outdoor ovens do you get to see?

StumbleUpon
LinkWithin Related Stories Widget for Blogs
Share/Bookmark